
Jonathan's Solace 18 EX Staining and Joining Tips
We are pleased to share one of our builders, Jonathan is working on a Solace 18 EX kit and sharing his techniques and process on the Facebook group Kayak Building. He picked up his kit recently and has been making huge strides on the kit, which has prompted Timber Boatworks to share his story and some of the things he is doing to being and customize his kit so well and efficiently. He has chosen to reduce the amount of stitching wires at the bow and stern of the kayak, to reduce the visible holes above the water line. He has also chosen to stain the deck, and use Mika powder pigments to do some accents and decorative work on the deck as well. These methods require skill and techniques above what the build manual offers, so we would like to share them with you so that you can consider these customizations in your build.
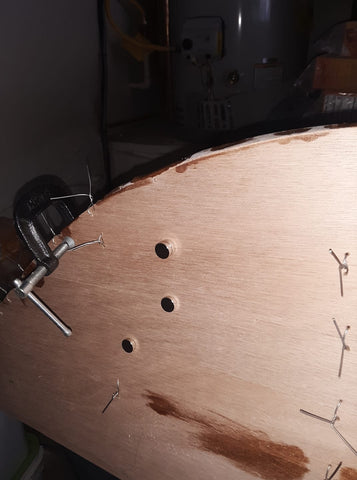
Jonathan has used rare earth magnets to align and hold the joints at the bow and stern of his Solace 18 EX kit, this will reduce the drill holes above the water line at the bow. The Solace kits have a five panel hull construction, which in terms of performance offers stability and a more rounded hull for smoother water displacement. We have designed this to reduce the hard chine (sharper panel joints) on our touring kayaks for more efficiency and speed in long duration paddling, as well as easy straight-line tracking for longer trips on large bodies of water. At the bow, Jonathan has used the magnets over the joints to hold them in alignment for the epoxy joining. This is a clever technique because the shape of the hull at the bow and stern is fairly vertical and smooth, so the magnets lend themselves to this shape. The magnets will not leave any marks or dents on the surface, which will leave a very clean natural look to the panels. Then panels at the bow and stern edge are still stitched with stainless steel wire to combat the bounce back tension in the panels. Clamps and dowels can also be used for a similar result, as described in the manual, however using rare earth magnets is an intelligent and creative solution to holding the panels in position.
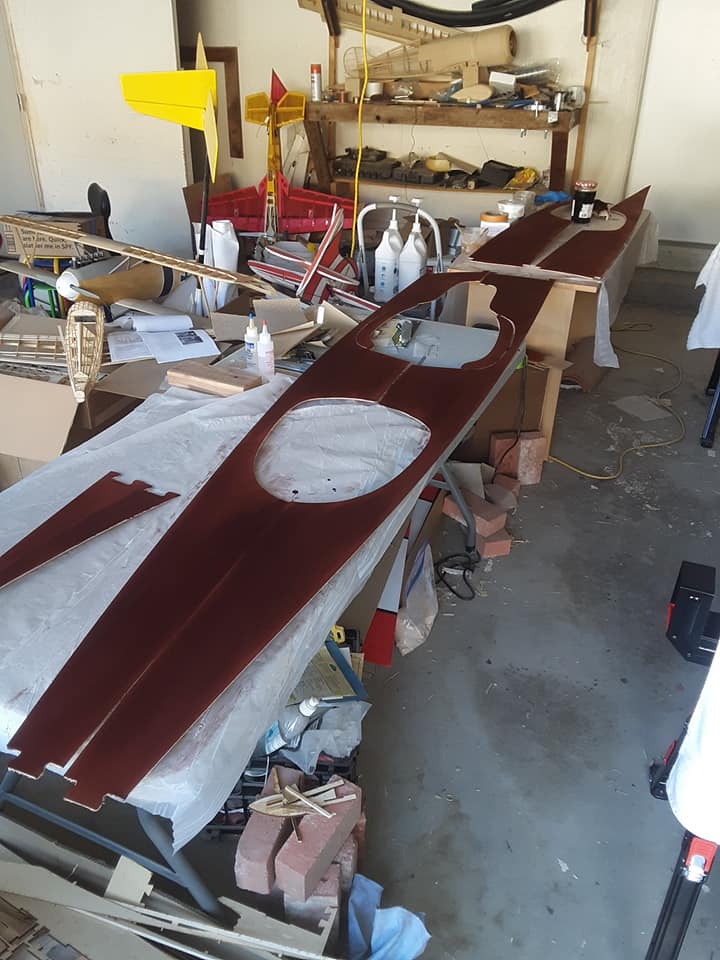
Jonathan is also staining and using Mika pigments for his deck, which create a unique and complex design for his craft. The stain he has chosen is Lockwood Metal Complex Dyes “Cuban Red Brown Mahogany” alcohol soluble dye, which he dissolved the powder pigment into hot water and applied coats with a clean rag. He has chosen to stain the deck components before epoxy joining the panels to avoid any epoxy barrier that can occur when epoxy is applied over the surface. He has joined and fiberglassed the inside of the panel after the liquid stain has fully dried. By applying the stain before epoxy joining the panels, Jonathan has guaranteed a very even colour on the deck without having any areas that may resist the stain. Epoxy will seal and water proof natural materials, and the stain cannot penetrate this surface. By staining the panels first this is not a problem. In the manual we have described a technique to apply stain after the panels are joined, as long as the joints have little to no epoxy bleed through onto the surface the aniline dye water-based stains will work.
When working with stains, there is a few major things to avoid and some good general practices to have the best result every time. The common hardware store deck stains are usually oil or alcohol-based stains, which when being applied onto a surface are supposed to offer some water proofing benefits. These stains leave a waxy or oily residue on the surface to resist water and weather, however this wax and oil is also resistant to epoxy. The epoxy cannot bond to latex, oil or alcohol residue, and the stained surface is difficult to scuff sand and solvent wipe to remove these residues. Jonathan has wisely chosen a water-based dye, which is mixed with water to leave an inert non contaminated surface for his epoxy and fiberglass layers. Timber Boatworks has recommendations for which stains can be used under epoxy, and depending on what the builder has access to can make sure that there are no compatibility issues. The second item regarding stain is to always run samples of the stain before applying it to any surface. By staining a piece of scrap wood with different mixtures and ratios of stain will allow you to test how to apply the stain as well as being able to control how dark or light the stain is. Jonathan has also chosen to run a samples and test to make sure that the stain is what he desired, and the result is clearly working well. This will be the same when working with the Mika powdered epoxy pigments, it is best to run a small sample to see how the epoxy interacts with the pigments and how to layer pigment to have the correct opacity and colour. Timber Boatworks does offer Youtube tutorials on how to use stain and Mika pigments, so that you can use techniques to achieve your desired result.
Jonathan’s build perfectly involves great build techniques as well as creativity within the build process. His design choices have influenced him to use stains and mika pigments on the deck of his kayak. His use of the appropriate technique will allow for long lasting epoxy finishing without incompatibility and negatively affecting durability. Jonathan’s experience with other builds and hobbies has informed him on the current build and we are looking forward to his competed kit.